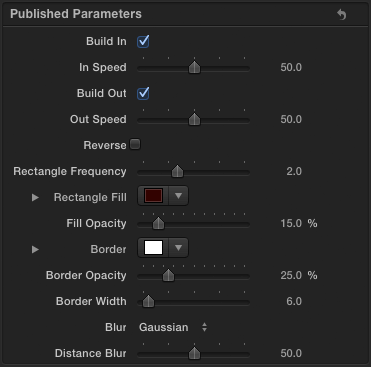
This Final Cut Pro X title template displays a series of four texts, zooming from one to the next:
Here are the controls:
This Final Cut Pro X title template displays a series of four texts, zooming from one to the next:
Here are the controls:

When learning Apple Motion I suggest that people avoid using keyframes to animate parameters. Motion is much happier using behaviours to change values over time.
This tip is for Motion users who have a good understanding of how to use behaviours to control animation.
A popular parameter behaviour is Ramp. Over the time of the behaviour it animates a parameter from one value to another. In this case, at the start of the behaviour, 180 degrees is added to the rotation parameter and this value changes to adding 0 degrees by the end:

The Curvature value of 100% means that the value eases out from 180 and eases into 0. Here’s the animation graph:

Unlike some behaviours you cannot directly set a curve shape using Ramp. In many cases you need to have a curve that eases in only or eases out only.
Using this tip, you get more control over the animation curve.
The 10.0.6 update added some text editing features for modifying title text. Here they are in action using the Zoom title (from the ‘Build In/Out’ section of the Titles browser) as an example.

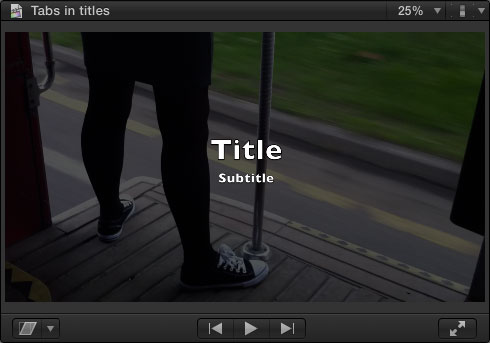
If you select the title in the timeline, or if the playhead is over the title, there are two new ways to select multiple text items:

You can drag in the viewer or Command-click boxes to select more than one text box.
Although welcome, the recent 5.0.5 update to Motion was nowhere near as big as the 10.0.6 update to Final Cut Pro. As is usual, Apple’s release notes refer to bug fixes and performance improvements. This time there are also user interface speed increases and a few interesting new features.
If you are designing titles, generators or effects which have a series of text layers that take turns in appearing, you can add a Text Edit marker to each text layer. Editors using the template in Final Cut Pro can navigate from marker to marker to make it easier to enter and edit text.
Here’s the Motion timeline for Final Cut’s built-in title from the Bumper/Opener section: ‘Snap – Text Build’:

The 10.0.6 update to Final Cut Pro removed a control from the Letterbox effect. You cannot control the vertical offset of the underlying clip.
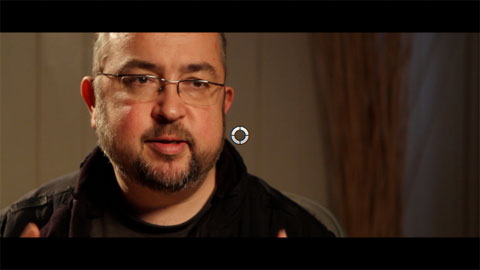
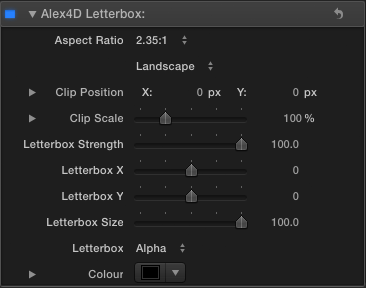
Here’s a Final Cut Pro X effect based on by Alex4D Widescreen Matte adjustment layer that brings back this control and more.
Here are the controls:
The 10.0.6 has made Final Cut Pro X noticeably faster at everyday tasks.
Given that, I was interested in seeing how it now compare with Premiere CS6.
This video times two everyday tasks in Adobe Premiere CS6 6.0.0 and Final Cut Pro X 10.0.6:
The source clip is a 1 minute 1080p25 ProRes 422(HQ) movie.
The first task is to render a Gaussian Blur effect on the timeline. The second task is to export a timeline without rendering first.
I’m much more used to using Final Cut, so if I’ve not given Premiere a fair chance, please comment below.
This was on an 3.4 GHz i7 iMac with 16GB of RAM and 2MB Radeon 6970M. The apps were running from an SSD, the files were on a 7200rpm drive. If you have a very different kind of Mac (or a PC), you’ll get different results. Also the brand of video card makes a difference. However, if you have the same kind of Mac as this, you’ll probably get similar results.
Perhaps others can do the same test on their computers to see the difference, it’s a matter of exporting 1500 frames (1 minute at 25fps, 50 seconds at 30 fps) of 1080p ProRes 422(HQ) movie and importing it into Final Cut Pro or Premiere. Maybe alternate video card architectures will make a big difference.
After making the video I updated my copy of Adobe Premiere to 6.0.2 and redid the tests three times. The update seemed to make a difference.
Timeline render: The times were 80, 61 and 62 seconds (compared with 75 seconds in the video)
Export: The times were 109, 100 and 101 seconds (compared with 117 in the video)
Alongside many new features, the 10.0.6 Final Cut Pro X update also includes many new effects, transitions, generators and titles.

Here are the controls:

In this example I’ve set the Blur Falloff to 0%, this makes the shadow blur increase the further the shadow extends from the source layer.
You can find it in the Stylize category.

One of the best unheralded features of Final Cut Pro X is the ability to rename the parts of a clip used on a timeline.
For example, imagine you have an interview clip with a couple of sections you’d like to try in a project. In 10.0.6 you can define multiple ‘selection ranges’:

The first range was set by pressing the I and O keys when the playhead was at the start and of the first range. The second range was set using the Shift-Command-I and Shift-Command-O keyboard shortcuts.
These ranges were added to a timeline using the W shortcut to insert at the start of a timeline:

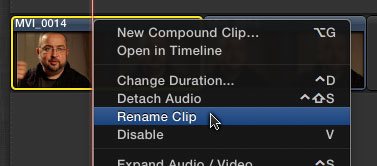
Each instance was then renamed. The first using Control- or Right-click to show the contextual menu for the clip:
The new version of Final Cut Pro X has some new commands. Some have new keyboard shortcut defaults. Others are available as commands which don’t have associated menu items or keyboard shortcuts. You can use these commands by adding your own keyboard shortcuts using the Final Cut Pro X > Commands > Customize command.
Show or hide the Event Viewer – Command-Control-3
Make Event Viewer active – Option-Command-3
Clear the selected ranges – Option-X
Move directly to next title text item – Option-tab
Move directly to previous title text item – Shift-Option-Tab
Set additional range selection start point – Command-Shift-I
Set additional range selection end point – Command-Shift-O
Insert freeze frame at playhead if it is in the timeline – Option-F
This Final Cut Pro X effect is an alternative way of adding a pixellation effect to a clip. It divides the clip into a grid and scales up each grid element.
Apologies to Matt Davis for scrambling his face.

Here’s what it looks like in action:
Here are the controls:
