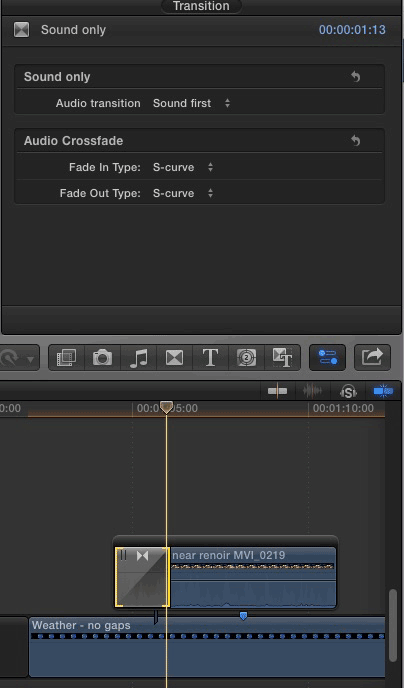
If you take a look inside Final Cut Pro X 10.0, you can find some interesting elements that might be there to support features that aren’t available yet.

Here is the contents of a file named “MediaAndSubTypes.strings”:

// Media Type
“vide” = “Video”;
“soun” = “Sound”;
“muxx” = “Muxed”;
“text” = “Text”;
“clcp” = “Closed Caption”;
“sbtl” = “Subtitle”;
“tmcd” = “Timecode”;
“tmet” = “Timed Metadata”;
“strm” = “Streaming”;
“twen” = “Tween”;
“sprt” = “Sprite”;
“sdsm” = “MPEG-4 SDSM”;
“odsm” = “MPEG-4 ODSM”;
“skin” = “Skin”;
“qtz ” = “Quartz Composer”;

// QuickTime VR
“qtvr” = “QuickTime VR”;
“pano” = “VR Panorama”;
“obje” = “QTVR Object”;

// Video Codecs
“videavc1” = “H.264”;
“videjpeg” = “Photo – JPEG”;
“videSVQ1” = “Sorenson Video”;
“videSVQ3” = “Sorenson Video 3”;
“videcvid” = “Cinepak”;
“viderpza” = “Video”;
“viderle ” = “Animation”;
“videJvt3” = “Apple H.264/AVC Video (Preview)”;
“videh263” = “H.263”;
“vides263” = “H.263”;
“videh261” = “H.261”;
“videIV41” = “Intel Indeo™ Video 4.3”;
“videmp4v” = “MPEG-4 Video”;
“videmjp2” = “JPEG 2000”;
“videmjpa” = “Motion JPEG A”;
“videmjpb” = “Motion JPEG B”;
“videavr ” = “Motion JPEG AVR”;
“videdmb1” = “Motion JPEG OpenDML”;
“videgif ” = “GIF”;
“videblur” = “Convolution Filter”;
“vide8BPS” = “Planar RGB”;
“videtrav” = “Traveling Matte”;
“videsmc ” = “Graphics”;
“videpng ” = “PNG”;
“videtint” = “Color Balance Filter”;
“videEIDI” = “EIDI”;
“videIV50” = “Indeo™ video 5.1”;
“videtiff” = “TIFF”;
“videVP31” = “On2 VP3 Video 3.2”;
“videzygo” = “ZyGoVideo”;
“videACTL” = “Streambox ACT-L2”;
“videmplo” = “Implode”;
“vide2vuy” = “Component Y’CbCr 8-bit 4:2:2 ordered Cb Y’0 Cr Y’1”;
“videyuvs” = “Component Y’CbCr 8-bit 4:2:2 ordered Y’0 Cb Y’1 Cr”;
“videv308” = “Component Y’CbCr 8-bit 4:4:4”;
“videv408” = “Component Y’CbCrA 8-bit 4:4:4:4 ordered Cb Y’ Cr A”;
“vider408” = “Component Y’CbCrA 8-bit 4:4:4:4 ordered A Y’ Cb Cr”;
“videv216” = “Component Y’CbCr 10,12,14,16-bit 4:2:2”;
“videv210” = “Component Y’CbCr 10-bit 4:2:2”;
“videv410” = “Component Y’CbCr 10-bit 4:4:4”;
“videy420” = “Three-Plane Component Y’CbCr 8-bit 4:2:0”;
“videa2vy” = “Two-Plane Component Y’CbCr,A 8-bit 4:2:2,4”;
“videap4h” = “Apple ProRes 4444”;
“videapch” = “Apple ProRes 422 (HQ)”;
“videapcn” = “Apple ProRes 422”;
“videapcs” = “Apple ProRes 422 (LT)”;
“videapco” = “Apple ProRes 422 (Proxy)”;
“videbhiv” = “bhiv”;
“videclou” = “Cloud”;
“videfire” = “Fire”;
“videdrmi” = “AVC0 Media”;
“videdslv” = “Cross Fade”;
“videdvc ” = “DV/DVCPRO – NTSC”;
“videdvcp” = “DVC – PAL”;
“videdvpp” = “DVCPRO – PAL”;
“videdv5n” = “DVCPRO50 – NTSC”;
“videdv5p” = “DVCPRO50 – PAL”;
“videdvhp” = “DVCPRO HD (720p60)”;
“videdvhq” = “DVCPRO HD (720p50)”;
“videdvh6” = “DVCPRO HD (1080i60)”;
“videdvh5” = “DVCPRO HD (1080i50)”;
“videdvh3” = “DVCPRO HD (1080p30)”;
“videdvh2” = “DVCPRO HD (1080p25)”;
“videembs” = “Convolution Filter”;
“videfmns” = “Film Noise Filter”;
“videgenk” = “Convolution Filter”;
“videkpcd” = “Photo CD”;
“vidematt” = “Gradient Wipe”;
“videmp2v” = “MPEG-2 Video”;
“videmp1v” = “MPEG-1 Video”;
“videpush” = “Push”;
“videpxlt” = “Apple Pixlet Video”;
“videicod” = “Apple Intermediate Codec”;
“videshrp” = “Convolution Filter”;
“videslid” = “Push”;
“videsmpt” = “Wipe”;
“videsolr” = “Color Balance Filter”;
“videxplo” = “Implode”;
“vide1” = “Uncompressed 1-bit Indexed Color”;
“vide2” = “Uncompressed 2-bit Indexed Color”;
“vide4” = “Uncompressed 4-bit Indexed Color”;
“vide8” = “Uncompressed 8-bit Indexed Color”;
“vide33” = “Uncompressed 1-bit Grayscale”;
“vide34” = “Uncompressed 2-bit Grayscale”;
“vide36” = “Uncompressed 4-bit Grayscale”;
“vide40” = “Uncompressed 8-bit Grayscale”;
“vide32” = “Uncompressed 32-bit ARGB”;
“vide24” = “Uncompressed 24-bit RGB”;
“vide16” = “Uncompressed 16-bit RGB 555 (Big Endian)”;
“vide24BG” = “Uncompressed 24-bit BGR”;
“videBGRA” = “Uncompressed 32-bit BGRA”;
“videABGR” = “Uncompressed 32-bit ABGR”;
“videRGBA” = “Uncompressed 32-bit RGBA”;
“videB565” = “Uncompressed 16-bit RGB 565 (Big Endian)”;
“videL555” = “Uncompressed 16-bit RGB 555 (Little Endian)”;
“videL565” = “Uncompressed 16-bit RGB 565 (Little Endian)”;
“vide5551” = “Uncompressed 16-bit RGB 5551 (Little Endian)”;
“videb64a” = “Uncompressed 64-bit ARGB”;
“videb48r” = “Uncompressed 48-bit RGB”;
“videb32a” = “Uncompressed 32-bit AlphaGray”;
“videb16g” = “Uncompressed 16-bit Grayscale”;

// Audio Codecs
“sounpaac” = “AAC (protected)”;
“sounvdva” = “DV”;

// Other Codecs
“texttext” = “Text”;
“qtvrqtvr” = “QuickTime VR”;
“tmcdtmcd” = “Timecode”;
“clcpc608” = “Closed Caption”;
“clcpc708” = “Closed Caption (708)”;
“texttx3g” = “Text”;
“sbtldrmt” = “Subtitle”;
“sbtltx3g” = “Subtitle”;
“hintrtp ” = “Hint”;
“sdsmmp4s” = “MPEG-4 SDSM”;
“odsmmp4s” = “MPEG-4 ODSM”;
“musimusi” = “Music”;
“skinskcr” = “Skin”;
“skinskdr” = “Skin”;
“strmrtsp” = “Streaming”;
“qtz qtz ” = “Quartz Composer”;

This is in no way a promise that a future version of Final Cut Pro will support these forms of media. It might be an element of the AV Foundation library for Snow Leopard compatibility (AV Foundation is the software that comes with Lion that is designed to eventually replace QuickTime).

Seeing as Final Cut Pro X is based on AV Foundation, many of AV Foundation’s features were designed with Final Cut Pro X in mind, there’s a good chance that a future version of X will be able to recognise some of these formats – if only to report that it can’t handle them!

More soon…

A good way to learn Motion 5 is to analyze the many effect, transition, title and generator templates built into Final Cut Pro X.

You can do this inside FCP X by control- or right-clicking the template and choosing ‘Open a Copy in Motion’ – but there’s a quick way to get access to nearly all the built-in effects in Final Cut Pro (the ones implemented using Motion).

In the Applications folder control- or right-click the Final Cut Pro application and choose Show Package Contents from the contextual menu:

Open the sub-folders in Final Cut Pro X so that the contents of ‘Final Cut Pro.app/Contents/PlugIns/MediaProviders/MotionEffect.fxp/Contents/Resources’ is visible:

The Motion templates that implement the effects, transitions, titles and generators in Final Cut Pro are in the ‘Templates’ folder. Use option-drag to make a copy of the whole folder elsewhere on your computer. Don’t forget to rename the Templates folder to something like ‘Motion Templates built-in’

Check out my free effects and articles on my Final Cut Pro X home page.

A few posts ago I described a keyboard sequence that prevented an edit automatically having audio crossfade applied. Some editors require the reverse – a quick way of applying an audio crossfade without applying any video transition.

You can choose when the video appears over the duration of the transition:

Sound first: the audio will fade in first, and when it is at the full volume set by the clip, the video appears.

Centred: the audio will fade in, and when it is half way to full volume, the video will appear

Video first: the video will appear first, then the audio will fade in.

If you apply the transition to the first clip in a connected storyline, the clip below the storyline will remain visible while the audio fades in if the setting of the Audio transition parameter is set to Centred or Sound first:

prelap-audio-on-conncted-clip

Download the 20K ZIP archive from here.

…and add it to a Motion Templates folder in the Movies folder of your home directory:

If you don’t have Motion installed , you won’t have a Motion Templates folder in your Movies folder. Download this set of empty folders and add them to the Movies folder of your home directory.

Although the folder is called Motion Templates, you don’t need to have Motion installed on your computer for this effect to work.

If you find this free plugin useful, you might like my Alex4D Animation Transitions plugin pack:

Find out more about Alex4D Animation Transitions.

There are many more free plugins on my Final Cut Pro X page

16-free-effects

This effect is for making a clip appear as four copies at the same time, or showing it alongside three other clips at the same time in a ‘4 up’ arrangement:

Here are the default controls:

If you click the image wells and select three more clips (from the timeline, or an from an event), the controls will look like this:

Download the effect archive from here.

Expand the ZIP archive and add the folder to the Motion Templates folder in the Movies folder of your home directory:

If you don’t have Motion installed, you won’t have a Motion Templates folder in your Movies folder. Download this set of empty folders and add them to the Movies folder of your home directory.

Although the folder is called Motion Templates, you don’t need to have Motion installed on your computer for this effect to work.

If you don’t want to use the clips from the beginning, edit them from the events library onto your timeline using an in-point of your choice. When selecting the clip to use in one of the three image wells, click the clip in the timeline:

The clip used in the image well was from three instances on the timeline with different in points:

There is the option to turn off the 4 up effect and select a shot to display. You can also choose to highlight one of the four shots in the 4 up display.

If you find this free plugin useful, you might like my Alex4D Animation Transitions plugin pack:

Find out more about Alex4D Animation Transitions.

There are many more free plugins on my Final Cut Pro X page

16-free-effects

Alex4D Dimensions is a Title Generator effect that mattes the edges of a project so the visible area has exactly the pixel dimensions you specify. It helps you make videos with frame dimensions that aren’t available as standard in Final Cut Pro X.


In this example, someone here in the UK needs to use some 1280 by 720 footage in a PAL 16:9 video – the square pixel dimensions of which are usually defined as 1024 by 576, dimensions that aren’t available in Final Cut Pro 10.0.

1. Choose the generator that matches the resolution of your current project.

2. Drag it above clip at the start of the project.

3. Set the width and height in pixels.

4. Extend the title to the length of your project.

5. If some secondary elements end up being above the Dimensions clip in the timeline, drag the clip above the rest (holding down Shift if you don’t want the clip moving backwards or forwards in time).

Once the Dimensions clip is in position, you can edit away as normal – repositioning and scaling any video and graphics clips, choosing which parts will be visible in the final movie.

You can scale, move and manipulate your content in any way you want. If you wish to see what you will be cropping off your final video, you can reduce the strength of the matte.

As this title has to be connected to a specific clip, it will vanish if you delete that clip. If you need to delete the first clip, you can choose to connect it to a different clip, or even a gap clip. With the title selected, Option-Command-click the title at the new position you want your connector to be:

Here’s a demo video:


Click the Vimeo logo to go to their site to see an HD version.

Download the effect archive from here.

The 2K effect is for 2048 by 1024 projects, the 4K effect is for 4096 by 2048 projects. Comment below if you’d like versions for 2048 by 1556 or 4096 by 3112 projects.

Expand the ZIP archive and add the four folders to the Motion Templates folder in the Movies folder of your home directory. Create an Alex4D folder in the Titles sub-folder:

If you don’t have Motion installed, you won’t have a Motion Templates folder in your Movies folder. Download this set of empty folders and add them to the Movies folder of your home directory.

Although the folder is called Motion Templates, you don’t need to have Motion installed on your computer for this effect to work.

To end up with a video at the dimensions you’ve chosen, use the Share menu to export a QuickTime movie and use Compressor, MPEG Streamclip or Adobe Photoshop CS4 to crop your video.

Here are the settings to crop the 1280 by 720 movie generated in the demo video to 1024 by 576. The crop values are calculated by halving the difference between the source and destination movies. 1280-1024=256, so crop left and right by 128. 720-576=144 so crop top and bottom by 72.

Compressor

Compressor is available from the Mac App Store.

MPEG Streamclip

Click to enlarge.
MPEG Streamclip is a free download from Squared5.

Alternatively, you can use QuickTime Player 7 by following this tutorial.

Check out my other free effects and articles on my Final Cut Pro X home page.

Visit my Final Cut Pro 7 page for over 20 free plugins and more
finalcuthomethumbnail

Looks like Apple’s softly softly actions to keep professionals onside are continuing.

Sam Johnson (of AMV LAB) was invited, amongst others, to an Apple briefing on Final Cut Pro X.

Here are is what Sam tweeted after the briefing. Follow him on Twitter where he posts as @aPostEngineer

1. FCP XML in/out is coming via 3rd party soon…no FCP 6/7 support project support coming ever it seems…

2. Ability to buy FCP7 licenses for enterprise deployments coming in the next few weeks…

3. FCPX EDL import/export coming soon…

4. FCPX AJA plugins coming soon for tape capture and layback…capture straight into FCPX bins.

5. XSAN support for FCPX coming in the next few weeks…

6. FCPX Broadcast video output via #Blackmagic & @AJAVideo coming soon…

7. Additional codec support for FCPX via 3rd Parties coming soon…

8. Customizable sequence TC in FCPX for master exports coming soon…

9. Some FCPX updates will be free some will cost…

He went on to answer some questions:

conigs Do they have any kind of timeframe for “soon”? Am I safe in guessing in 2011?

aPostEngineer within a few weeks for some updates i.e. XSAN up to a few months for 3rd party developers to get their heads around the API.

gigarafa what about the rest of the suite? Color, dvd studio etc?

aPostEngineer they have unfortunately reached their EOL and will not be developed any more..

They said that taking FCP7 off the shelf was the most complained thing… (Answering a message from @NMRUK)

Peter Wiggins of Idustrial Revolution was also there.

Compressor works in 64 bit but throttles down to 32 bit when using 32bit only codecs

A few DAM companies have been working closely with Apple and FCPX – Expect a range of asset management solutions from very cheap to expensive soon.

Peter has written more extensively about this briefing over at the fcp.co forum.

Thursday afternoon UPDATE from Sam Johnson’s tweets

Apple have contacted me in regards to my tweets…and wanted to make sure the facts are right…

2. Ability to buy ADDITIONAL FCP7 licenses for EXISTING volume licensed deployments is something Apple are only looking into at this stage.

4. FCPX AJA plugins coming soon for tape capture and layback…capture straight into FCPX events. Will not be a plugin but an AJA application.

Sam missed the first 10 minutes of the briefing, so might have been worried that Apple banned any reporting and he didn’t get the message, however I imagine Peter was there from the beginning, and he published late last night.

Apple may be irritated that Sam didn’t get the precise message about new FCP7 licenses, but that was at least 50% Apple’s responsibility. They chose the method for the release of this information.

Check out my free effects and articles on my Final Cut Pro X home page.

Visit my Final Cut Pro 7 page for over 20 free plugins and more
finalcuthomethumbnail

Here’s my next Final Cut Pro X effect: a title generator of a resizable text box with various fill options.

A frame from a Final Cut Pro project showing the application of an instance of the Alex4D Text Box title generator

The same title generator can produce this result as well:
A frame showing that the area behind the text can also be blurred

Here are the controls:
A screenshot of the default settings for the Alex4D Text Box title generator

Although you can keyframe all the parameters in Final Cut Pro X, the co-ordinates will not animate correctly, this is due to bugs/design decisions in the current versions of Final Cut and Motion.

Download the effect archive from here.

Expand the ZIP archive and add the folder to the Motion Templates folder in the Movies folder of your home directory. Create an Alex4D folder in the Titles sub-folder:

If you don’t have Motion installed, you won’t have a Motion Templates folder in your Movies folder. Download this set of empty folders and add them to the Movies folder of your home directory.

Although the folder is called Motion Templates, you don’t need to have Motion installed on your computer for this effect to work.

10.0.3 update and fading the box in and out

I’ve updated the effect to work with version 10.0.3, an update that changed the way title generators worked. I’ve added a new Opacity parameter which you can keyframe (or fade in and out using the video animation graph). For more information on what’s changed, visit my blog post on the subject.

If you haven’t updated to 10.0.3, this effect will show a blue screen and/or cause Final Cut Pro X 10.0, 10.0.1 and 10.0.2 to crash. The 10.0.3 update works fine and is available for free from the Mac App Store. If you don’t want to upgrade download the old version.

Bugs

As the Final Cut Pro X and Motion 5 combination is relatively new, there are still a few bugs you will need to work around.

When you resize the text box so the right-hand edge changes Final Cut doesn’t get sent the message. That means it doesn’t redraw the text to reflect the new boundaries.

In this example, a wide text box has been made narrower:
Frame showing that Final Cut sometimes get the message about the change in size of a text box

The solution is to get Final Cut to redraw the text. The quickest way is to toggle the horizontal alignment. It will also be redrawn if you make any text or text format changes:
Frame showing what the text will look like once you get FCP to redraw it

If you find this free plugin useful, you might like my Alex4D Animation Transitions plugin pack:

Find out more about Alex4D Animation Transitions.

There are many more free plugins on my Final Cut Pro X page

16-free-effects

When you apply video transitions in Final Cut Pro X, it also applies an audio crossfade that lasts the same time. There is no option to turn this feature off. This can be a problem for tight interview edits.

There is a way of modifying an edit point so that when a video transition is applied, there is no audio crossfade.

The method is to move the audio part of the edit so it doesn’t exactly line up with the video.

You shouldn’t worry about this being noticeable because FCP can move audio edits in sub-frame units – which are 1/80th of a frame; in the case of 25p timelines, that is 1/2000th of a second.

1. Make sure clips around the edit have their audio and video tracks expanded by double-clicking each of their audio waveforms or by selecting them and choosing ‘Clip > Expand Audio / Video’ (Control-S). Alternatively you can set the timeline to ‘View > Expand All Audio/Video Clips > For All’ mode. This is so you can select the left and right edges of the audio tracks only.

Screenshots of the timeline before and after audio and video clips have been expanded

2. Select only the left and right audio edges of the edit – Press Shift-\

Screenshot of only the audio edges selected

3. Move the audio edit one subframe to the left – Press Option-,

Screenshot of only the audio edges moved back one subframe

4. Select the video edges by selecting the second next edit point – Press ‘ twice (because the first ‘ press selects the right-hand side of the audio edit point)

Screenshot of offset audio edit

5. Apply your transition – no crossfade can apply to the audio edit as it doesn’t line up with the video edit.

Screenshot of offset audio edit with transition applied

You can see that the audio waveforms join up with each other without any crossfade.

Once your transition is applied, you can still ripple and roll the clips – even though the audio edit doesn’t line up with the video edit, from a clip manipulation point of view, they are still a single edit.

Check out my free effects and articles on my Final Cut Pro X home page.

Those editors who are used to aligning transitions that start or finish on edits in Final Cut Pro Classic miss having the same feature in Final Cut Pro X.

Here’s a workaround – a couple of transitions that start a cross dissolve at the start or finish of an edit.

In Final Cut Pro Classic, transitions can be set to align at the start, centre or finish of an edit:
Screen capture of transitions in Final Cut Pro 7

This sort of alignment can’t explicitly be set in Final Cut Pro X. So, as a workaround until this feature is added, I’ve made two more cross dissolve transitions that can be used to get the same effect:

As the opacity of the incoming clip changes for only half the length of the transition, you have to make the duration of these two transitions twice that of the standard cross dissolve transition to keep the duration of the effect the same:
Screen capture of transitions in Final Cut Pro X

Download the transitions archive from here.

Expand the ZIP archive and add the folder to the Motion Templates folder in the Movies folder of your home directory:

If you don’t have Motion installed, you won’t have a Motion Templates folder in your Movies folder. Download this set of empty folders and add them to the Movies folder of your home directory.

Although the folder is called Motion Templates, you don’t need to have Motion installed on your computer for this effect to work.

If you find these free plugine useful, you might like my Alex4D Animation Transitions plugin pack:

Find out more about Alex4D Animation Transitions.

There are many more free plugins on my Final Cut Pro X page

16-free-effects

Here’s my first Final Cut Pro X effect: an improved version of the built-in Mask effect.

I’ve added four more points, access to numerical values for the 8 points:

In Final Cut Pro X, you aren’t limited to the minimums and maximums defined by the sliders. The maximum value for Roundness controlled by the slider is 50, but you can enter larger values in the numeric field:

I’ve also added the option to control the density of the mask inside and outside of the shape:

March 2012 update: I’ve created a more advanced set of Mask effects for Final Cut Pro X, with options to have more points on the mask and keyframable transform and distort controls.

Download the effect archive from here.

Expand the ZIP archive and add the folder to the Motion Templates folder in the Movies folder of your home directory:

If you don’t have Motion installed, you won’t have a Motion Templates folder in your Movies folder. Download this set of empty folders and add them to the Movies folder of your home directory.

Although the folder is called Motion Templates, you don’t need to have Motion installed on your computer for this effect to work.

To use the effect, apply it to a connected clip to a the main storyline:

Note that although you can keyframe the parameters in Final Cut Pro X, the co-ordinates will not animate correctly. I’ve asked Apple about this and they know about the bug in Motion 5/FCP X.

If you find this free plugin useful, you might like my Alex4D Animation Transitions plugin pack:

Find out more about Alex4D Animation Transitions.

There are many more free plugins on my Final Cut Pro X page

16-free-effects