Free Final Cut Pro plugins: Alex4D Curves effects
These six Final Cut Pro X effects give you more control over the way transform and trim effects work.
You can choose how values change between keyframes – effect the shape of the value curves for x position, y position, rotation, scale and edge trim amount:

In the scale and rotation effects you can also set the centre point around which the clip is scaled and rotated:

Download Alex4D Curves from here!
You can also control the order of these effects. You can trim before scaling, then scale before rotating and rotate before setting x and y position. You do this by choosing the order you apply the effects the clip. If you change your mind about the order, you can drag effects up and down within Video panel of the clip inspector.
Here are the controls for all six effects as they appear when applied to a single clip:
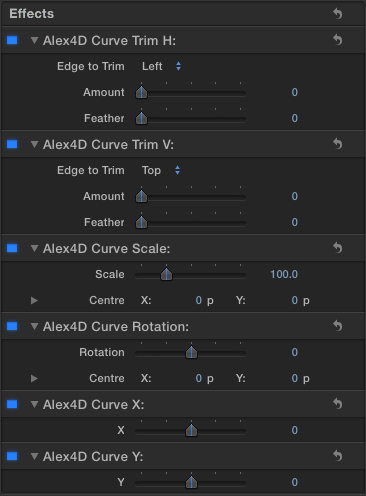
Choosing the order you apply the effects
If you apply the Alex4D Curve Rotation effect to rotate a clip, it can only apply to the original area of the clip that is visible before you applied the effect.
You can rotate a clip:

You can scale a clip using Alex4D Curve Scale:

If you rotate a clip and then scale it using two effects in this order:

…you’ll see the rotated clip has now been scaled down. As the scale effect is only sent the result of the rotate effect it scales down the clip but does not restore the edges:

However, if you scale the clip first and then rotate it by changing the order in which the effects are applied:
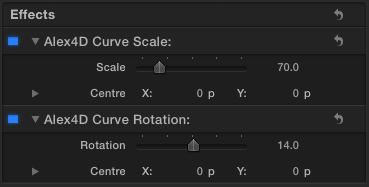
…the scaled down image is then rotated:

Showing a keyframe curve
To display the value curve for a parameter of an effect you’ve applied to a clip, click the control in the top-left corner of the clip:

Choose ‘Show Video Animation’ from the pop-up:
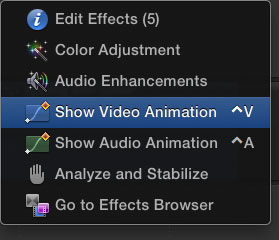
From the parameter menu pop-up:
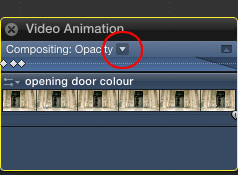
Choose one of the parameters in one of the Alex4D Curve effects (in this case the clip has had five different Alex4D Curve effects applied to it):

Click the show curve control:
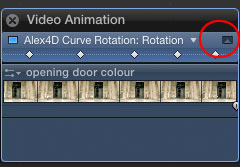
To see the graph of the value changing over the time of the clip:
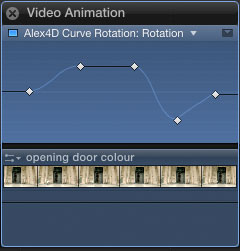
Changing the keyframe curve
To add a keyframe, option-click the curve. To delete a keyframe, select it by clicking it and then pressing the delete key. Drag up and down to increase and decrease the value, drag left and right to move the keyframe backwards and forwards in time.
If you click to select a keyframe, you can use the keyboard to perform the same adjustments option-up arrow and option-down arrow to change the keyframe value, ‘,’ and ‘.’ to move the keyframe back and forward in time (the amount moved depends on the zoom level you are using in the timeline).
Note that in versions of Final Cut up to 10.0.2, the numeric value shown while you change a parameter value can be incorrect.
If there is no keyframe at the play head and you change the value in the video panel of the clip inspector (by dragging a slider), all keyframes change by the same amount.
To change the ‘curviness’ of the way a parameter changes between keyframes, drag horizontally on a curve:
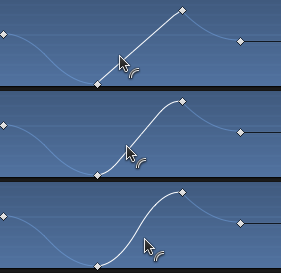
A more curvy line will make a parameter gradually change at the start and finish of the line – which is a more natural for some changes.
You can choose whether a curve starts or finishes gradually by choosing alternative curve shapes. Control- or right-click a curve and choose a new shape from the pop-up menu:

Motion note
If you create effects for Final Cut Pro X using Motion, you can have a parameter have graphs like this simply by rigging it. Only the first parameter published can have its graph displayed in Final Cut. That’s why I needed to make separate effects for X and Y position.
Download Alex4D Curves from here!
If you have Motion installed, or you have already installed third-party effects, download the effect archive from here.
Expand the ZIP archive and add the folder to Movies : Motion Templates : Effects : Alex4D
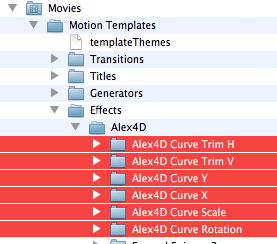
If you don’t have Motion installed on your Mac and you’ve never installed any third-party effects, download the archive of the Motion Templates folder with the Alex4D Curve effects in the correct sub-folder. Expand the ZIP and put the resulting Motion Templates folder in the Movies folder of your home folder.
If you find these free plugins useful, you might like my Alex4D Animation Transitions plugin pack:
Find out more about Alex4D Animation Transitions.
There are many more free plugins on my Final Cut Pro X page


Nice! I’ll have a look at these. Finally, less restrictions in keyframing…
10.0.2 + alex4d = 10.0.3
You Rock. Thank you so much. I’m learning to edit the best way… on a giant personal project, and you’re effects I think are going to keep me in FCPX more often. Truly excellent, so I can put OFF learning AE as long as possible. ; )
Hi, this is exactly the kind of plug in I need, but it seems to crash on 10.0.8 when I try to add an ease to the scale curve. Help!
“Showing a keyframe curve
To display the value curve for a parameter of an effect you’ve applied to a clip, click the control in the top-left corner of the clip:”
I can’t find that control in the top letft corner of the clip
THIS is the plugin i was searching for! thank you very much!